Master the Perfect Cheesecake: Your Guide to Rich, Creamy, No Cracks Guaranteed
The allure of a perfect cheesecake is undeniable. That first bite – a symphony of rich, creamy texture melting in your mouth, balanced by a tangy sweetness and a buttery, crumbly crust. For many home bakers, achieving this dream dessert without the dreaded cracks, lumps, or sinking can feel like an insurmountable challenge. But fear not! With the right techniques and a deep understanding of this beloved dessert, you can consistently create a flawless, bakery-quality cheesecake that will impress every time. Cheesecake’s journey is as rich and layered as its flavor. Its origins trace back over 4,000 years to ancient Greece, where a simple mixture of cheese, flour, and honey was served to athletes at the first Olympic Games in 776 BCE. As the dessert traveled through the Roman Empire and across Europe, it evolved, incorporating new ingredients and styles. The iconic New York-style cheesecake, dense and velvety, emerged in the early 20th century, propelled by Jewish immigrants and the widespread availability of cream cheese. This classic American rendition became a global phenomenon, setting the standard for what many consider the ultimate cheesecake experience. To delve deeper into this fascinating history, read Cheesecake's Epic Journey: Ancient Greece to New York Classic. Today, while variations abound, the pursuit of that quintessential rich, creamy, and crack-free masterpiece remains a universal goal. This comprehensive guide will equip you with the knowledge and actionable tips to master the art of cheesecake making, transforming intimidation into pure culinary confidence.The Foundation of Flavor: Choosing Your Ingredients Wisely
A perfect cheesecake begins long before it enters the oven – it starts with the ingredients. Every component plays a crucial role in achieving that desired texture and flavor profile.- Cream Cheese: The Heart of the Cheesecake
For a truly rich and creamy cheesecake, full-fat cream cheese is non-negotiable, especially for American-style versions. Its high fat content (around 33%) is what delivers that characteristic smooth, dense, and luxurious mouthfeel. Lower-fat alternatives often result in a drier, grainier texture. Brands like "Philadelphia" popularized the standard, and for good reason – their consistent quality and fat content are ideal. - Embrace Room Temperature Ingredients: This is perhaps the most critical, yet often overlooked, tip. Ensure your cream cheese, eggs, and any dairy like sour cream or heavy cream are at room temperature. Why? Cold ingredients don't blend smoothly. Cold cream cheese will inevitably lead to lumps, no matter how much you mix, and cold eggs can cause the batter to seize. Allowing ingredients to warm up ensures a homogenous, silky-smooth batter without excessive mixing.
- Eggs: The Essential Binder
Eggs are vital for setting the cheesecake batter into that custard-like consistency. They provide structure and richness. Using large eggs is standard, and as mentioned, room temperature is key for seamless incorporation. - Sugar: More Than Just Sweetness
Granulated sugar not only sweetens but also contributes to the cheesecake’s tender texture. Ensure it's fully dissolved during mixing for a smooth finish. - The Perfect Crust: Buttery & Crumbly
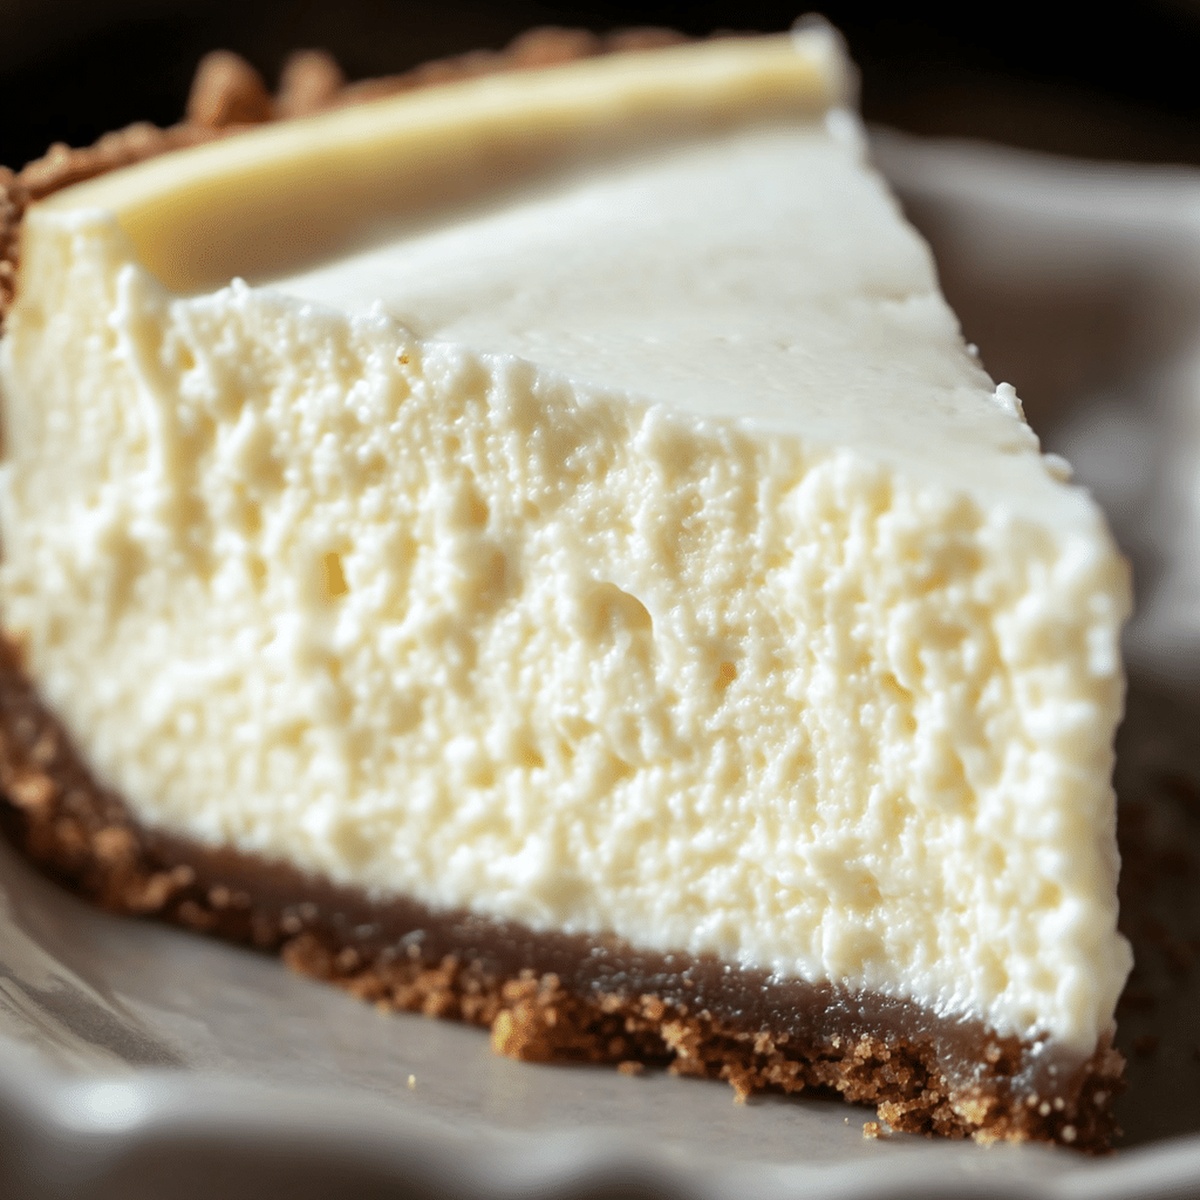
A classic graham cracker crust offers a delightful contrast in texture and flavor. To make it, simply combine finely crushed graham crackers with melted butter and a touch of sugar. Press it firmly into the bottom and slightly up the sides of your springform pan. Alternatives like digestive biscuits, ginger snaps, or even oreo cookies can be used for different flavor profiles.
Crafting the Silky Batter: Techniques for Lumps and Air Bubble Prevention
Achieving that perfectly smooth, lump-free cheesecake batter requires mindful mixing. This stage is where many common pitfalls can be avoided.Step-by-Step Mixing Mastery:
- Cream the Cream Cheese First: In a large mixing bowl, beat the softened cream cheese on low speed until it's completely smooth and free of any lumps. Scrape down the sides of the bowl frequently. This is your initial opportunity to ensure a silky base.
- Gradually Add Sugar: Slowly incorporate the granulated sugar, continuing to beat on low speed until it’s fully combined and the mixture is light and fluffy. This gradual addition helps dissolve the sugar properly.
- Incorporate Eggs One at a Time: Add eggs one at a time, beating just until each egg is incorporated before adding the next. This prevents overmixing and ensures even distribution. This is crucial: Overmixing at this stage incorporates too much air into the batter. While air can be good for some cakes, it's the enemy of a dense, creamy cheesecake and a major contributor to cracks during baking.
- Fold in Remaining Dairy and Flavorings: Gently fold in sour cream, heavy cream, vanilla extract, or any other flavorings like lemon zest. Mix only until just combined. The goal is to achieve a uniform batter without developing gluten or creating excessive air bubbles.
- Scrape, Scrape, Scrape: Throughout the mixing process, use a rubber spatula to frequently scrape down the sides and bottom of your mixing bowl. This ensures all ingredients are evenly incorporated and no pockets of unmixed ingredients remain.
The Bake and Beyond: Guaranteeing a Crack-Free Finish
The baking and cooling stages are where the magic truly happens – and where most cracks develop. Understanding the science behind these steps is your ultimate weapon against cheesecake imperfections.The Ultimate Secret: The Water Bath (Bain-Marie)
The water bath is your absolute best friend for a crack-free cheesecake. It provides a moist, even, and gentle heat environment, preventing the edges of your cheesecake from baking faster and drying out before the center is cooked. This slow, steady heat is what produces that signature creamy, uniform texture. Here’s how to set it up:
- Prepare Your Springform Pan: Tightly wrap the exterior of your 8 or 9-inch springform pan with two to three layers of heavy-duty aluminum foil. This is crucial to prevent water from seeping into your crust.
- Place in a Larger Roasting Pan: Carefully place your foil-wrapped springform pan inside a larger roasting pan.
- Pour in Hot Water: Once the cheesecake batter is in the springform pan, place the roasting pan (with the cheesecake) into the preheated oven. Then, carefully pour hot water into the larger roasting pan, ensuring it comes halfway up the sides of your springform pan.
Baking & Cooling Protocols for Perfection:
- Preheat Accurately: Ensure your oven is fully preheated to the specified temperature. Sudden temperature fluctuations are detrimental.
- Gentle Baking: Many recipes call for an initial higher temperature for a short period, followed by a longer bake at a lower temperature. This helps set the cheesecake without overcooking it too quickly.
- Know When It's Done: The Jiggle Test: Resist the urge to overbake! A perfectly baked cheesecake will still have a slight "jiggle" in the very center (about 1-2 inches in diameter) when gently shaken. The edges should appear set. It will continue to cook and firm up as it cools.
- The Art of Slow Cooling: This is equally as important as the water bath for preventing cracks.
- Oven Cool Down: Once baked, turn off the oven, prop the door open slightly (you can use a wooden spoon), and allow the cheesecake to cool inside the oven for at least an hour, or even two. This gradual decrease in temperature prevents a sudden shock that can cause cracks.
- Room Temperature Transition: After oven cooling, remove the cheesecake (still in its water bath if applicable) to a wire rack. Let it cool completely to room temperature. Run a thin knife around the edge of the pan *before* it cools completely; this helps prevent the cheesecake from sticking to the pan sides as it contracts, which can also cause cracks.
- The Essential Chill: Once at room temperature, transfer the cheesecake (covered loosely with plastic wrap) to the refrigerator. Chill for a minimum of 6-8 hours, but ideally overnight. This allows the cheesecake to fully set, firm up, and for its flavors to deepen and meld.
Serving Your Masterpiece: Tips for Presentation & Enjoyment
After all your meticulous work, presenting your perfect cheesecake is the final flourish.- Clean Slices: For perfectly clean slices, dip a sharp, thin knife in hot water and wipe it clean between each cut.
- Topping Perfection: A classic cheesecake is beautiful on its own, but toppings can elevate it further. Fresh berries, a simple berry compote, chocolate ganache, or a salted caramel sauce are all excellent choices. Add toppings just before serving to maintain the cheesecake's pristine appearance.
- Make Ahead Advantage: Cheesecake is one of those rare desserts that truly tastes better the next day after a full night of chilling. This makes it an ideal make-ahead option for entertaining.
- Storage: Store leftover cheesecake, covered, in the refrigerator for up to 3-5 days.
